How to make a music poster for your classroom
Start from a free trebly poster, choose what's on it, pick a size and a look, put your class's name at the top, and print it. Six steps, a few minutes, no account.
You make it in the Music Theory Poster Maker, in your web browser. There’s nothing to install and no account to make. It works on a phone, but a computer or tablet gives you more room. The first time you open it, a short tour points at each step. To see it again, press Take the tour in the corner of the poster area (on a phone, the ? at the top).
The six steps
1. Start from a free poster
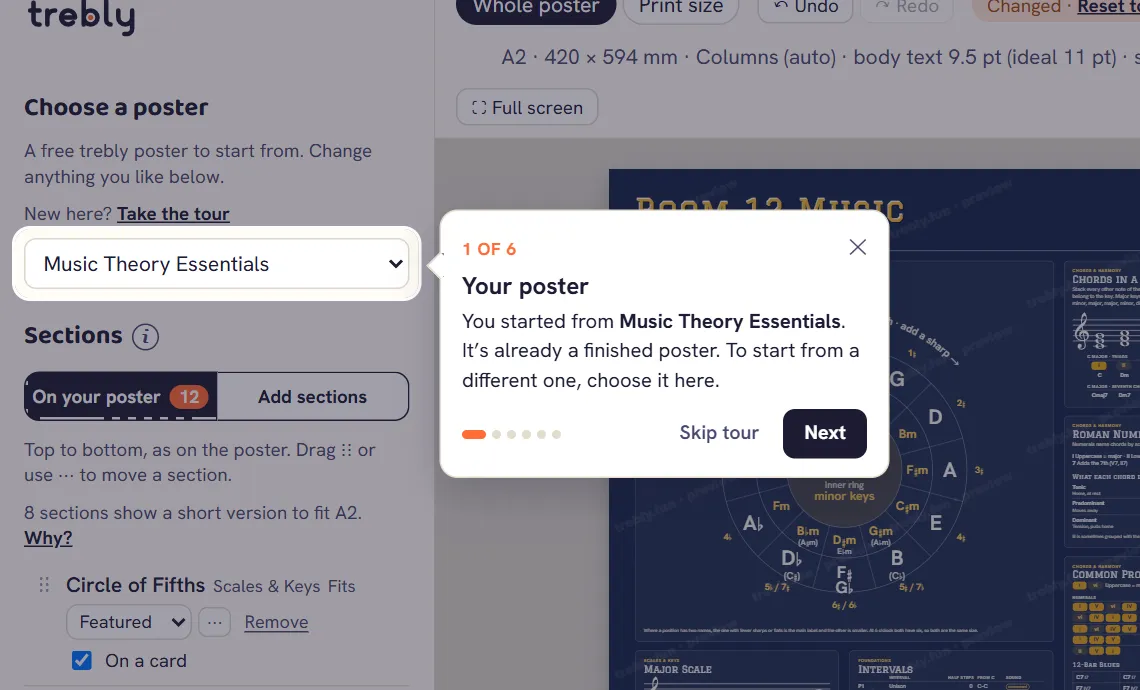
Every poster starts from one of the free trebly posters and charts, so you begin with a finished poster, not a blank page. Pick the one closest to what you teach under Choose a poster, for example Music Theory Essentials for a general music room, Piano Basics for a studio, or a single chart such as the circle of fifths. The Poster Maker page shows them all with pictures.
If you only want that poster as it is, you’re done: it’s free. Skip to step 6.
2. Choose what’s on it
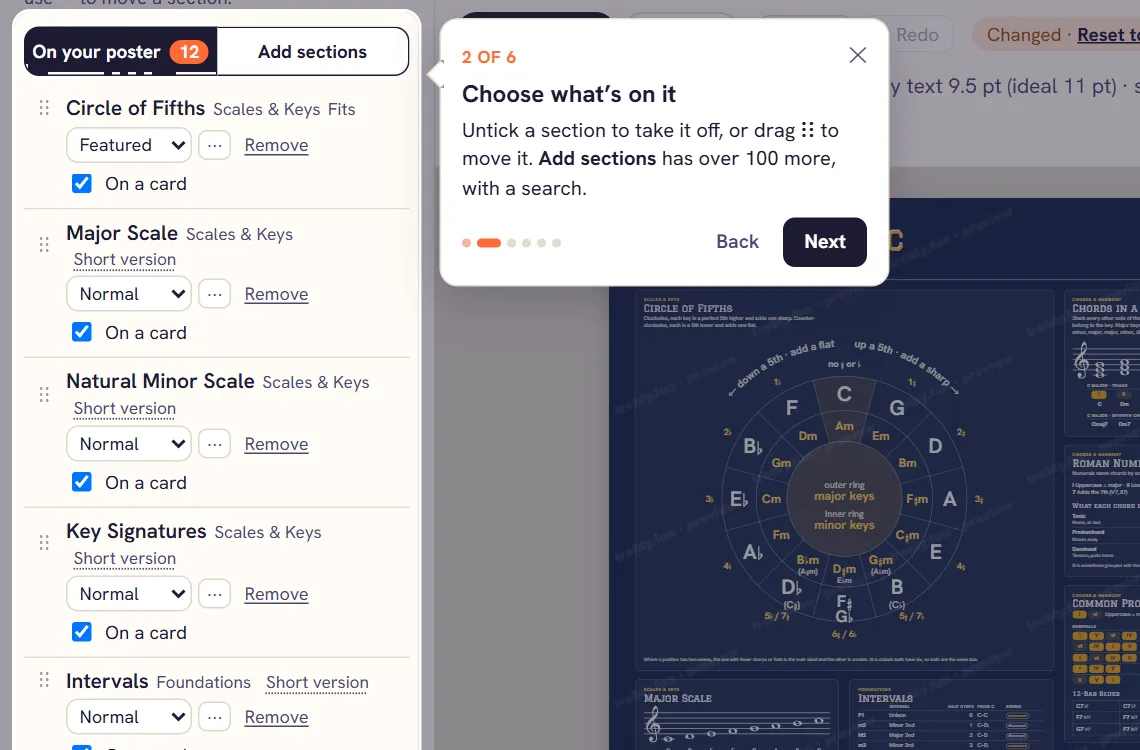
On your poster lists the sections, top to bottom. Untick one to take it off, or drag ⋮⋮ (or use the ⋯ menu) to move it. Add sections has over 100 more, with a search and filters for theory, rhythm, piano, guitar, bass and ukulele. Pick what your students are learning this term, not everything at once: fewer sections print bigger and read better from the back of the room.
The menu beside each section sets how much room it gets. See Sections below.
3. Pick the size and the music terms
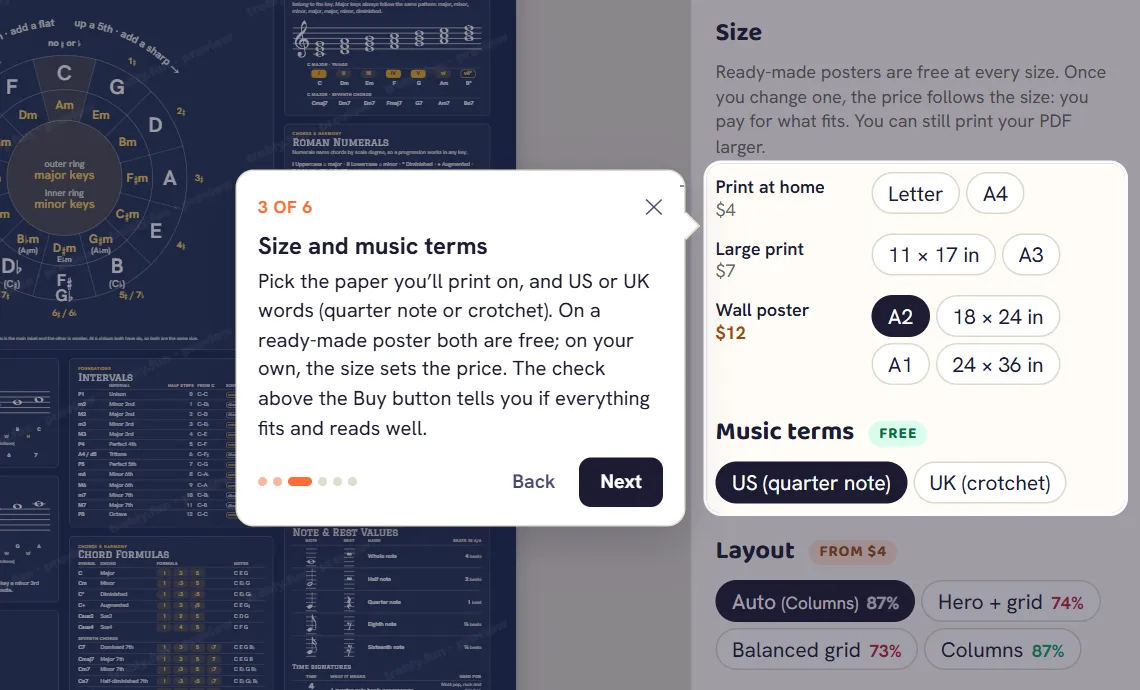
Choose the paper you’ll print on, from Letter and A4 up to 24 × 36 in, and US or UK words (quarter note or crotchet). On a ready-made poster both are free. On your own poster the size sets the price, because bigger paper holds more: $4 for Letter or A4, $7 for 11 × 17 in or A3, $12 for A2 and larger. You can still print your PDF bigger than the size you bought. The check above the Buy PDF button tells you whether everything fits and the text is big enough. For a classroom wall, 18 × 24 in or A2 reads from across the room; How to print your poster has a table of sizes and distances.
4. Pick a look
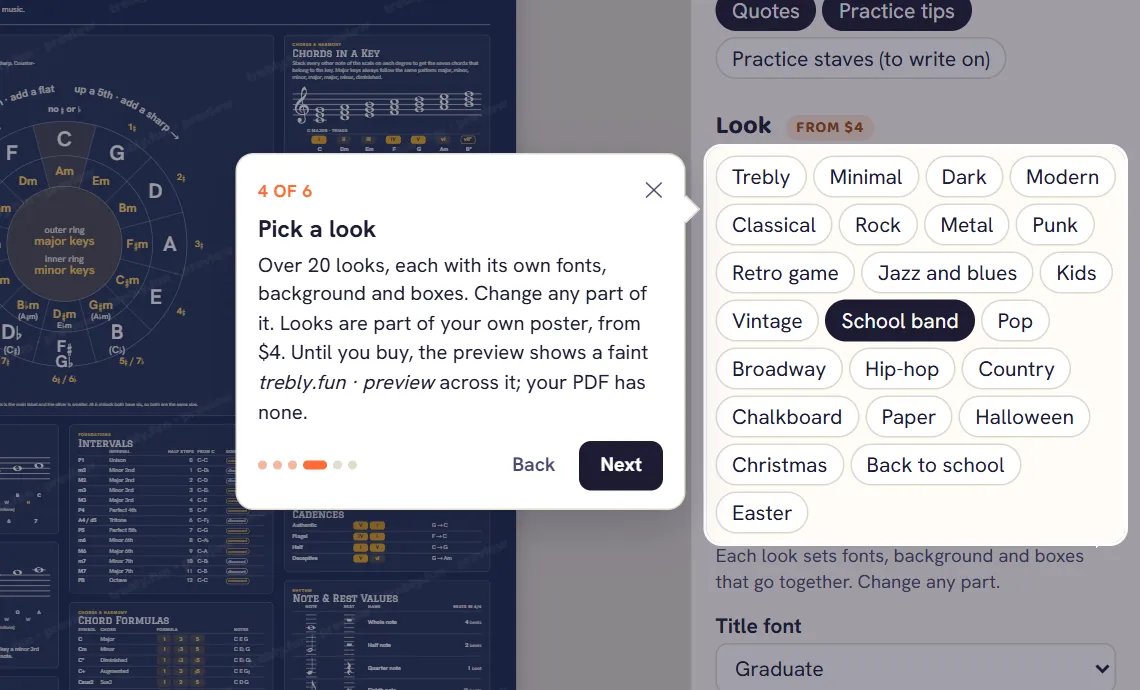
A look sets the fonts, background and section boxes together: Classical, Rock, Kids, Chalkboard, School band, Christmas and more. Each part can be changed afterwards (see Look). Until you buy, a changed poster shows a faint trebly.fun · preview across it; the PDF you buy doesn’t have it.
5. Add your title
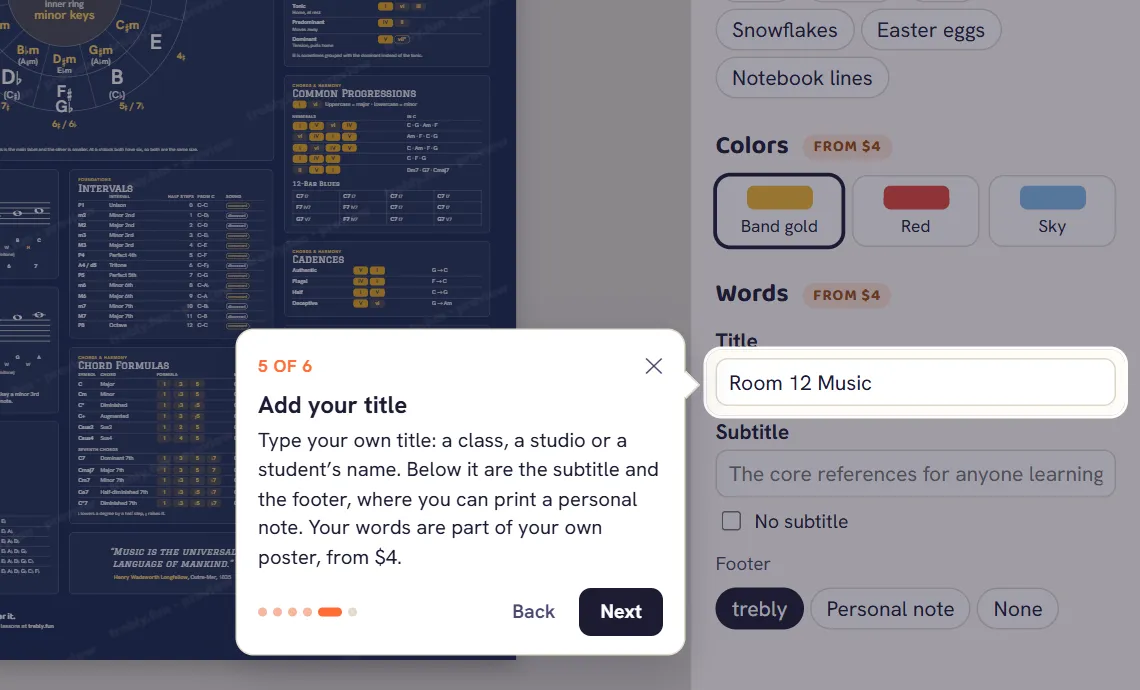
Type your class’s, studio’s or student’s name as the title, for example “Room 12 Music” or “Mrs. Lopez’s Choir”. Under it are the subtitle and the footer, where you can print a personal note instead of the trebly line.
6. Download or buy, then print
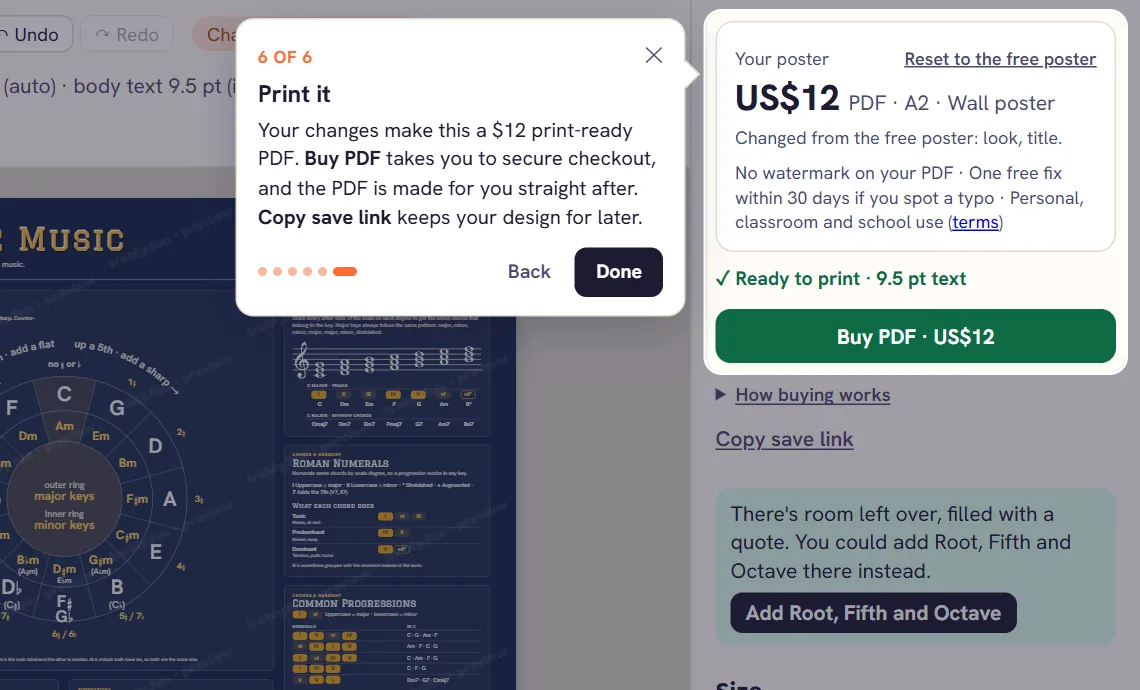
- Not changed: press Download free PDF.
- Changed: press Buy PDF. The price follows the size: $4 for Letter or A4, $7 for 11 × 17 in or A3, $12 for A2 and larger. The Before you buy box shows what you’re getting; then you pay on secure checkout. The print-ready PDF is ready in about a minute, and we email you the link. If you spot a typo afterwards, you can fix it once for free within 30 days (terms).
Then print it at 100% (actual size), at home for Letter and A4 or at a print shop for the bigger sizes: see How to print your poster.
Not finished? Copy save link keeps the whole design in a link. Open it later, on any device, to carry on.
What’s free and what you pay for
| Free | The PDF, from $4 |
|---|---|
| Any free poster or chart exactly as it is | Any change to the sections: which ones, their order or their emphasis |
| Any of the eight sizes | Any look other than Trebly, and any change to fonts, boxes, background or colors |
| US or UK music terms | Your own title, subtitle or footer note |
| Copying a save link | A different layout, or what fills the spaces |
The box above the download button always says which one your poster is, and what you’ve changed.
Every setting, explained
Choose a poster
The free poster you start from. Choosing another one replaces the sections with that poster’s own, so pick it first.
Sections
Each section has a menu that sets its emphasis:
- Featured: shown bigger (two columns wide, at the top) and always keeps its explanations.
- Important: keeps its explanations, and is only shortened as a last resort.
- Normal: its explanations are the first to go when space is tight. The drawing and its key always stay.
When a section is shortened to fit, it says Short version beside its name. Give it more room by making the poster bigger, taking another section off, or setting it to Important.
Add sections has every section, with a search (for example “chords”, “crotchet” or “tab”), filters (Theory, Rhythm & Reading, Piano, Guitar, Bass, Ukulele, Extras), and Beginner-friendly only. Under Extras are a Practice Tip, a Quote, Your Message and a Practice Staff to write on.
Poster check
Above the download or Buy PDF button, updated as you change the poster. It says Ready to print when all three of these pass:
- Fits: everything fits on the page with nothing cut off.
- Easy to read: the text is big enough for this size from a normal distance (about 8.5 pt on A4 up to 13 pt on A1, and never below 7 pt).
- No empty gaps: every space is used, by a section or a small panel such as a tip.
When one doesn’t, it shows that problem in a box, with a fix right beside it, such as a bigger size (with its price) or a section to take off. A poster that doesn’t fit can’t be bought until it does.
Size
Letter (8.5 × 11 in), A4, 11 × 17 in, A3, A2, 18 × 24 in, A1 and 24 × 36 in. Each PDF is made at its exact size. Bigger sizes hold more sections at the same text size, so a changed poster is priced by size: Print at home (Letter, A4) $4, Large print (11 × 17 in, A3) $7, Wall poster (A2, 18 × 24 in, A1, 24 × 36 in) $12.
Music terms
US (quarter note, half step) or UK (crotchet, semitone). Every section switches, so the whole poster uses one set of words.
Layout
- Auto picks the layout that suits your sections best, and says which one it chose.
- Hero + grid: one big section (your Featured one, or the first) on the left half, others stacked beside it, the rest below.
- Balanced grid: sections in even rows.
- Columns: sections run down in columns; Featured sections go first, across the top.
The percentage beside each one scores how easy the text would be to read in that layout, or says “doesn’t fit”.
Fill spaces with
Where sections leave room, trebly adds a small panel instead of leaving a gap: Quotes, Practice tips or Practice staves to write on. Tick what it may use. Tips and quotes added this way show in the Sections list, where you can edit them or make them a section.
Look
Each look sets fonts, background and boxes that go together. Then change any part:
- Title font and Title effect (for example Rainbow letters, Cut-out letters or Varsity).
- Section font: clear fonts only, so every poster stays easy to read.
- Section boxes: cards, frames and other styles around each section, or none.
Background
- Page: plain colors and textures such as parchment, kraft paper or a chalkboard. Every page color is tested so the text stays readable.
- Pattern (on plain colors): music notes, stars, hearts, dots, snowflakes, notebook lines, or Your words, a class or band name (emoji too) that runs along the edges like a frame.
- Text color, where a page allows more than one.
A colored page runs to the edge of the paper. Home printers leave a thin white border around it; a print shop can print it right to the edge.
Colors
The colors of the section headings and highlights. Each look offers its own set.
Words
Title and Subtitle (or No subtitle). The Footer is the trebly line, a Personal note (a thank-you or a motto, for example) or nothing.
Save or share
Copy save link keeps every choice and all your text in a link. Open it on any device to carry on, or send it to a colleague. There’s no account; the link is the only copy, so keep it.
Undo, views and full screen
Undo and Redo (Ctrl+Z and Ctrl+Y) step through your changes. Whole poster fits it on the screen; Print size shows it at its real size, for checking the text. Full screen hides the rest of the page. Reset to free takes you back to the free poster.
Questions
Do I need an account? No. Your design isn’t kept on our side until you buy; a save link keeps it for you.
Can I make it on my phone? Yes. The tabs along the bottom (Sections, Style, Size, Download) open each part. For a big poster, a computer or tablet is easier: copy the save link on your phone and open it there.
How long does it take? A few minutes from a free poster. Choosing sections for a particular class takes longest.
Can I use it with my classes? Yes: posters are for personal, classroom and school use. The terms say what that covers.
I closed the tour. How do I see it again? Press Take the tour in the corner of the poster area, or New here? Take the tour under Choose a poster. On a phone, it’s the ? at the top.